How to Master Automotive Electrical Connectors Types for DIY Projects

Understanding the various automotive electrical connectors types is essential for enhancing your DIY projects. Familiarity with these connectors ensures that your work is efficient and safe. They play a crucial role in ensuring that your automotive tasks function properly. By using the right connectors, you can reduce risks and improve the quality of your work. Therefore, take the time to explore different connectors and elevate your DIY skills.
Overview of Car Electrical Connectors
Knowing car electrical connectors is key for DIY fans. These connectors help make projects safe and work well. Let's look at some common ones you might see.
Butt Connectors
Butt connectors are very common in car electrical work. They join two wires together safely by squeezing them into the connector. This type is great for making wires longer or fixing broken ones. Using butt connectors gives a strong link that handles shakes and bumps in cars.
Spade Connectors
Spade connectors are also popular in car electrical jobs. They have a flat, fork shape that makes them easy to attach and remove. You use them when connecting wires to a block or screw terminal. Spade connectors come in different sizes, so pick the right one for your job. They let you connect quickly without needing to solder.
Crimp Connectors
Crimp connectors are important in car electrical tasks too. You use them by pressing the connector onto the wire tightly. This keeps the wire secure with a good connection. Crimp connectors include ring, spade, and bullet types. A good crimping tool helps get the best results with these connectors, making long-lasting connections.
By learning about these car electrical connectors, you can do DIY projects better and more confidently. Each type has its own job, and knowing how to use them helps your work a lot. So take time to learn about these tools and improve your DIY skills!
Metripack Connectors
Metripack connectors are loved by DIY car fans. You see them often in cars because they connect well. They come in different sizes, so they work for many jobs. Using Metripack connectors gives a strong and lasting link, which is important for car wiring.
These connectors have a special lock to stop them from coming apart by accident. This is helpful when cars shake or move. You can connect and disconnect them easily without special tools, making your projects simpler.
To use Metripack connectors right, get a good crimping tool. This tool helps join the wire and connector tightly. A proper crimp makes the connection strong and reliable. This step is key for making sure your car wires work well in all conditions.
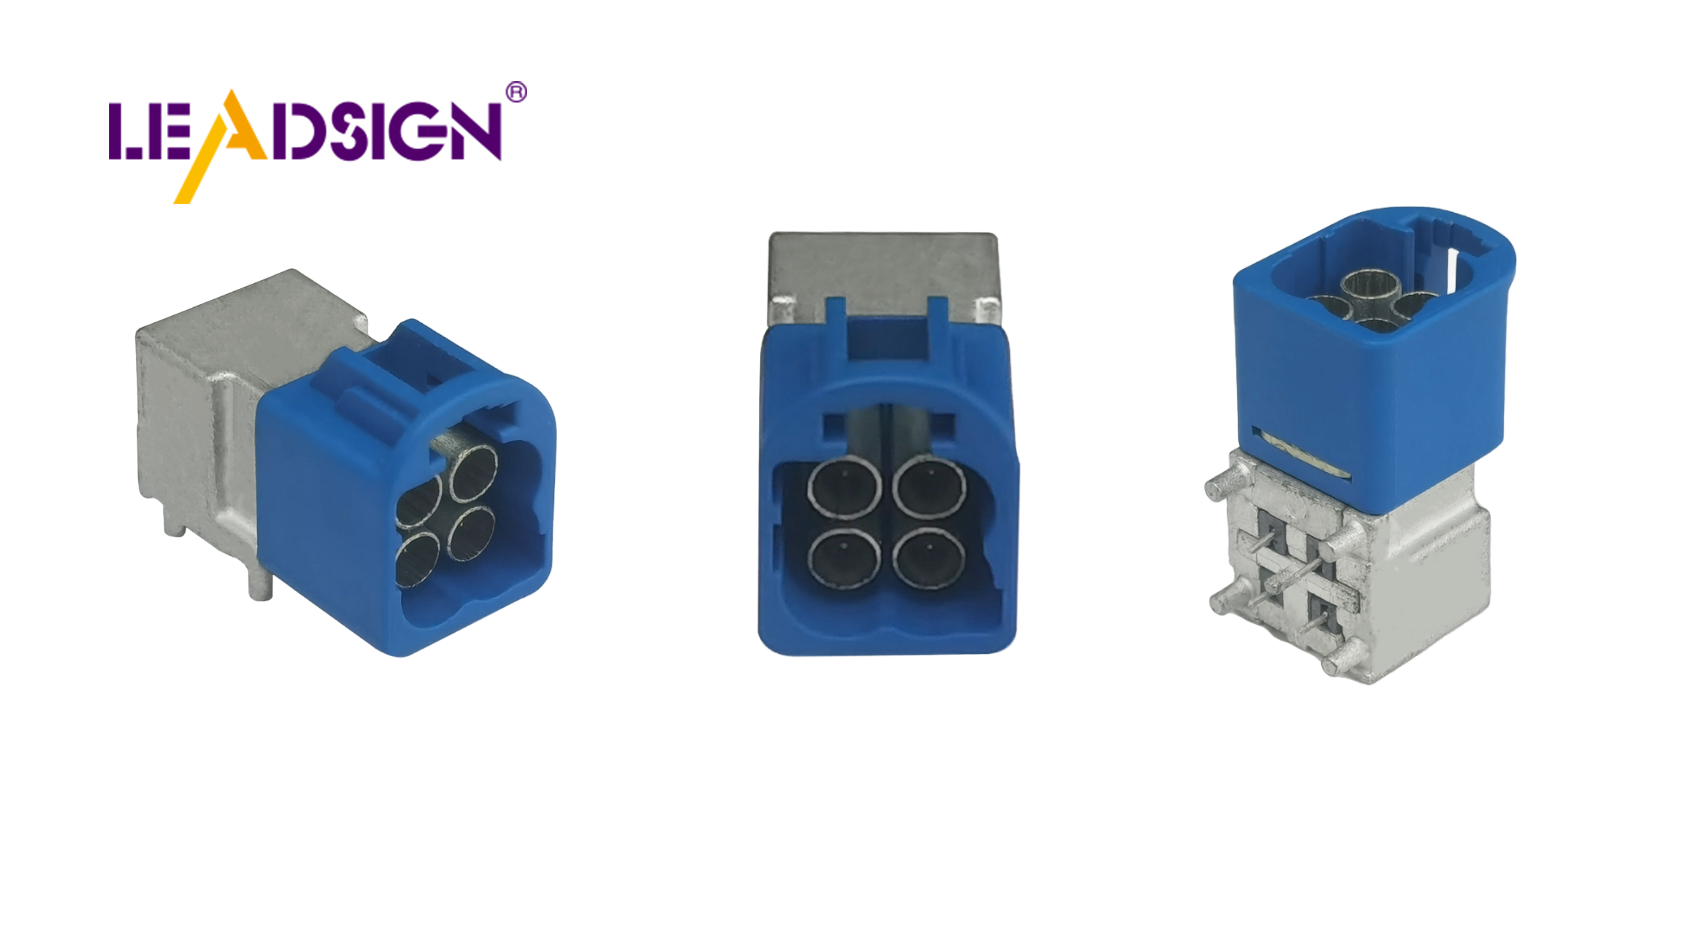
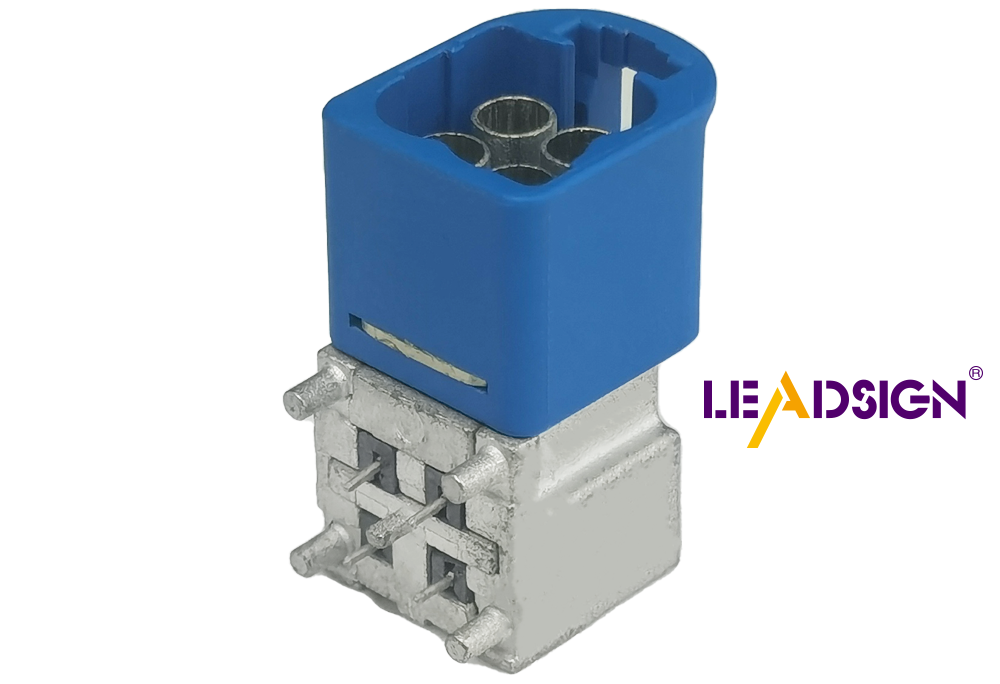
FAKRA and HFM connectors are needed for fast data in new cars. You find these in things like GPS, music systems, and driver help tools. They handle high speeds up to 28 Gbps, great for smart car tech.
FAKRA and HFM connectors are needed for fast data in new cars. You find these in things like GPS, music systems, and driver help tools. They handle high speeds up to 28 Gbps, great for smart car tech.
FAKRA connectors use color codes to match parts easily, lowering mistakes during setup. They come in different shapes like straight or angled, fitting many setups.
HFM connectors are newer coaxial types that save space by 80% compared to old FAKRAs. Saving space matters when working in tight spots in cars. HFM also sends data fast, crucial for self-driving features.
When using these car electrical connectors, check impedance and frequency range carefully. Matching them with your car's system ensures best performance. Knowing FAKRA and HFM features helps you do better DIY projects with new car tech.
Tools and Materials for Connectors
To work with automotive electrical connectors types, you need the right tools. These tools make your job easier and ensure strong connections. Let's look at what you need.
Soldering vs. Crimping
You may wonder about using soldering or crimping. Both have good and bad points, so choose based on your project.
Soldering: This joins wires by melting solder. It makes a strong link for permanent use. But, it takes practice to learn well. You need a soldering iron, solder, and steady hands. It's best when vibration isn't an issue.
Crimping: This presses a connector onto a wire. It's quicker and simpler than soldering, great for beginners. Crimping gives a solid connection that handles shaking well. A good crimp tool is needed for tight fits. It's perfect for most automotive electrical connectors types.
Essential Tools for DIY Fans
For working with automotive electrical connectors types, certain tools are key.
Wire Strippers: They remove wire covers without harm. Pick ones that fit your usual wire sizes.
Crimp Tool: A must-have tool ensures tight connector fits on wires. Find one with changeable parts for different connectors.
Solder Iron: If soldering, get a good iron with temperature settings.
Heat Gun: Shrinks tubing over connections to protect from water and wear.
Multimeter: Tests connections by checking flow and measuring voltage to ensure all works well.
Connector Kit: Having various sizes of connectors helps in any project situation.
With these tools and knowing about soldering versus crimping, you can handle any DIY task involving automotive electrical connectors types confidently! Practice often to improve skills.
Step-by-Step Guide to Using Connectors
Preparing the Wires
Before you start connecting wires, you need to prepare them properly. This step ensures a strong and reliable connection. Here's how you can do it:
Select the Right Wire: Choose automotive-grade primary wire. It should be stranded for flexibility and durability. This type of wire withstands the vibrations and harsh conditions in vehicles.
Strip the Wire Insulation: Use a wire stripper to remove about 1/4 inch of insulation from the end of each wire. Make sure not to nick or damage the wire strands. A clean strip ensures a better connection.
Twist the Wire Strands: After stripping, twist the exposed wire strands together. This step keeps them neat and prevents fraying. Twisting also makes it easier to insert the wire into the connector.
Clean the Wire Ends: If you're soldering, clean the wire ends with a bit of flux. This removes any oxidation and helps the solder adhere better. A clean surface is crucial for a strong solder joint.
Expert Tip: An IPC Master Solderer suggests using a hot plate to preheat components like brass rings before soldering. This technique helps achieve a better solder connection by preventing the component from acting as a heat sink.
Connecting the Wires
Once your wires are ready, it's time to connect them. You can use either crimping or soldering, depending on your preference and the project's requirements.
Insert the twisted wire into the connector barrel.
Use a crimping tool to compress the connector onto the wire. Ensure a tight fit for a secure connection.
Check the connection by gently tugging on the wire. It should stay firmly in place.
Soldering Method:
Secure the wire and connector in a vise to keep them steady.
Heat the soldering iron and apply a small amount of solder to the tip.
Touch the soldering iron to the wire and connector, then feed solder into the joint. Let the solder flow and cover the connection evenly.
Remove the soldering iron and let the joint cool naturally. Avoid moving the wire until the solder solidifies.
Expert Advice: Use a low-wattage soldering iron with a fine tip for precision. A vise can help hold your work steady, making the process easier and safer.
Protect the Connection:
Slide a piece of heat-shrink tubing over the connection before you start. Once the connection is made, use a heat gun to shrink the tubing. This step protects the joint from moisture and wear.
By following these steps, you ensure that your automotive electrical connections are strong and reliable. Whether you choose crimping or soldering, having the right tools and techniques makes all the difference. Practice these methods to improve your DIY skills and tackle any automotive wiring project with confidence!
Fixing and Securing Connections
Finding and Fixing Connection Issues
When using car electrical connectors, problems can happen. Spotting these early saves time. Here’s how to find and fix common issues:
Loose Connections: If a connection is loose, it might not work well. Check if the wire is crimped or soldered tightly. A good tool makes sure it's tight. When soldering, cover the joint fully.
Corrosion: Water can cause rust, making connections bad. Look for rust on connectors. Use heat-shrink tubing to keep water away. This stops future rust.
Broken Wires: Wires can break inside their cover. Use a multimeter to check if the wire works all through. If broken, strip the cover and reconnect with a butt connector or solder.
Wrong Connectors: Using wrong connectors can make things not work right. Make sure you use the correct one for your job. For example, SolderStick Spade Connector Kit helps by giving right connectors for different tasks.
Pro Tip: Always look at your connections closely and pull them gently to check if they are secure.
Testing and Making Connections Last Longer
Making sure your connections last is important for any DIY project. Here’s how to test and make them stronger:
Do a Pull Test: After connecting, gently pull on the wire. A strong connection stays firm; if it comes apart, redo it.
Use a Multimeter: Check voltage and flow with a multimeter to see if electricity moves correctly in the circuit.
Add Heat-Shrink Tubing: Slide tubing over the connection then shrink it with heat for extra protection from water and wear.
Check Often: Regular checks catch problems early before they get big like wear or loose parts.
Pick Good Materials: Using good wires and connectors makes connections last longer as shown in Nortra Cables Case Studies which shows quality matters.
By following these steps, you can fix and secure your car electrical connections well! Practice these ways to be confident that your DIY projects will last long!
Advanced Tips for DIY Car Wiring
Knowing Sealed vs. Unsealed Connectors
When doing car wiring, know sealed and unsealed connectors. This helps you pick the right one.
Sealed Connectors: These have a seal to keep out water and dirt. They are best for places like engines or under cars. The seal keeps connections clean and working, even in tough spots. Using them stops rust and electric problems.
Unsealed Connectors: These don't have seals. They work well inside the car where it's dry. They are easy to use, good for places without much moisture.
Quick Tip: Check where you'll use the connector. Pick sealed ones for outside or open areas to make sure they last long.
Using Heat-Shrink Tubing and Other Protection
Keeping your connections safe is key for good car wiring. Heat-shrink tubing and other tools help with this.
Heat-Shrink Tubing: It shrinks when heated, sealing tight around connections. It stops water, dust, and wear from hurting them. Put it on before finishing the connection, then heat it up.
Cable Looms: These cover wires to protect them from rubbing or breaking. Use looms where wires might touch things or each other.
Electrical Tape: Wrap tape around connections for extra safety from water and to hold them tight.
Regular Checks: Look at your connections often to find problems early like rust or loose parts.
Pro Advice: Use these protections in your wiring projects for stronger setups that last longer. Regular checks stop issues before they start.
By knowing connectors and using protection, you can make better DIY car wiring projects that last longer.
Knowing how to use car electrical connectors is important for DIY projects. These connectors keep your work safe and make it better. Try different kinds, like butt connectors and push-in wire connectors. This helps you see which ones work best for you. Practicing builds confidence and makes you better.
To learn more, watch online videos, join chat groups, or read books about car electrical connections. These can give you good ideas and tips to help with your DIY projects. Keep trying new things and learning to get really good at using car electrical connectors!
See Also
Understanding HSD Connectors Essential for Automotive Applications
Uncovering Advantages of Fakra Connectors in Vehicles
Significance of FAKRA Connectors in Automotive Use Cases
