How to Easily Install Automotive Wiring Connector Types

Intro: A Proper Installation Prevents Callbacks
Correctly installing automotive wiring connectors is critical for vehicle safety and performance. A poor connection can cause intermittent signals, flickering lights, sensor failures, or even electrical fires. For repair shops and fleet managers, mastering the installation of different connector types – crimp, solder, waterproof – reduces come‑backs and ensures long‑term reliability. This guide covers step‑by‑step procedures, common mistakes, and best practices for power, signal, and high‑speed data connectors.
In this guide, you will learn:
The main connector types (crimp, solder, waterproof) and when to use each
How to prepare wires and select the right tools
Step‑by‑step installation for crimping, soldering, and sealing
Troubleshooting and maintenance tips
Why FAKRA/HSD data connectors require special handling
How LEADSIGN pre‑terminated cables simplify installation and eliminate errors
1. Understanding Auto Wire Connector Types
Connector Type | Best for | Pros | Cons | Sealed? |
|---|---|---|---|---|
Crimp | Permanent power & ground, engine bay, vibration‑prone areas | Fast, strong, vibration‑resistant | Requires proper crimp tool; poor crimp leads to failure | Optional (heat‑shrink) |
Solder | Low‑vibration interior, sensitive audio wires | Very low resistance, permanent bond | Slow, heat can damage insulation, brittle | No (needs heat‑shrink) |
Waterproof (sealed) | Underbody, exterior lights, engine bay sensors | Resists moisture, salt, dirt | Larger size, higher cost | Yes (IP67/IP69K) |
FAKRA (coaxial) | Camera video, GPS antenna, 5G | 50Ω impedance, colour‑coded, shielding | Signal only – not for power | IP67 optional |
HSD (differential) | USB‑C, Ethernet, LVDS | 100Ω, locking, high data rate | Signal only – not for power | Optional |
Key insight: For most automotive power circuits (lights, sensors, ECU power), crimp connectors (sealed or unsealed) are the professional choice. Solder is rarely used in high‑vibration areas. For data (video, GPS, USB‑C), you must use FAKRA or HSD – never crimp or solder these with generic terminals.
2. Preparing for Installation
✅ Tools You Will Need
Tool | Purpose |
|---|---|
Ratcheting crimper (with interchangeable dies) | Consistent, gas‑tight crimps |
Wire strippers (self‑adjusting) | Clean strip without nicking strands |
Soldering iron & rosin core solder | For low‑vibration interior splices |
Heat gun | Shrinking heat‑shrink tubing |
Multimeter | Testing continuity, voltage drop |
Depinning tool | Removing terminals from housings |
Wire stripper gauge | Measuring strip length |
✅ Stripping Wire Correctly
Measure insulation to strip – typically 5‑8 mm (0.2‑0.3 inches).
Insert wire into correct stripper notch (match AWG).
Squeeze gently, rotate slightly, and pull off insulation.
Do not nick the copper strands – nicked wires break under vibration.
✅ Choosing the Right Connector for the Application
Application | Recommended Connector | Sealed? |
|---|---|---|
Interior light / switch | Crimp bullet or spade | No |
Engine bay sensor (temp, pressure) | Crimp butt (heat‑shrink) or Deutsch DT | Yes |
Underbody camera power | Sealed butt (heat‑shrink) or Weather Pack | Yes (IP67) |
Backup camera (1080p) | FAKRA blue (50Ω coax) | Optional |
GPS antenna | FAKRA amber | Optional (exterior use needs IP67) |
USB‑C CarPlay | HSD USB‑C (locking) | No (interior) |
Pro tip: For any connector exposed to water, salt, or mud, always use IP67 sealed connectors – unsealed connectors will corrode within months.
3. Installation Methods – Step by Step
🔹 Crimp Connectors (Preferred for Automotive)
Step‑by‑step:
Strip wire to proper length.
Insert wire fully into crimp terminal until insulation butts against stop.
Place terminal in correct die (colour‑coded: red=22‑18 AWG, blue=16‑14 AWG, yellow=12‑10 AWG).
Squeeze ratcheting crimper until it releases.
Pull test (5‑10 lbs) – wire must not move.
For sealed butt connectors (heat‑shrink): slide tubing over crimp and heat until adhesive oozes.
Insert crimped terminal into housing (if applicable) until click.
Common mistakes:
Using pliers instead of a ratcheting crimper → loose connection.
Over‑crimping → cracked barrel.
Under‑crimping → wire pulls out.
No pull test → hidden failure.
🔹 Soldering Connectors (Low‑Vibration Interior Only)
Step‑by‑step:
Strip wires (5‑8 mm). Twist strands together.
Clean with isopropyl alcohol.
Heat the wires with soldering iron (not the solder).
Apply rosin core solder to the heated wire – let it flow.
Allow joint to cool naturally – do not blow on it.
Slide heat‑shrink tubing over joint and shrink.
Safety precautions:
Work in a well‑ventilated area.
Wear safety glasses.
Let the iron cool before storing.
🔹 Sealing with Heat‑Shrink Tubing
Always use adhesive‑lined (dual‑wall) heat‑shrink for exterior or underbody splices.
Cut tubing at least 20 mm longer than the joint.
Slide over wire before crimping or soldering.
After connection, slide over joint and heat evenly until adhesive seals both ends.
4. Waterproof Connectors – When and How
Location | Required Sealing | Example |
|---|---|---|
Engine bay | IP67 or IP69K | Deutsch DT, Weather Pack |
Underbody | IP67 | Sealed butt (heat‑shrink) |
Exterior lights | IP67 | Weather Pack |
Door harness | IP67 (grommet at hinge) | Sealed multi‑pin |
Installation tips for sealed connectors:
Ensure rubber wire seals are correctly positioned before crimping.
Apply dielectric grease to the seal areas – not to the electrical contacts.
Check that housing gasket is seated.
5. Special Case – FAKRA/HSD Data Connectors
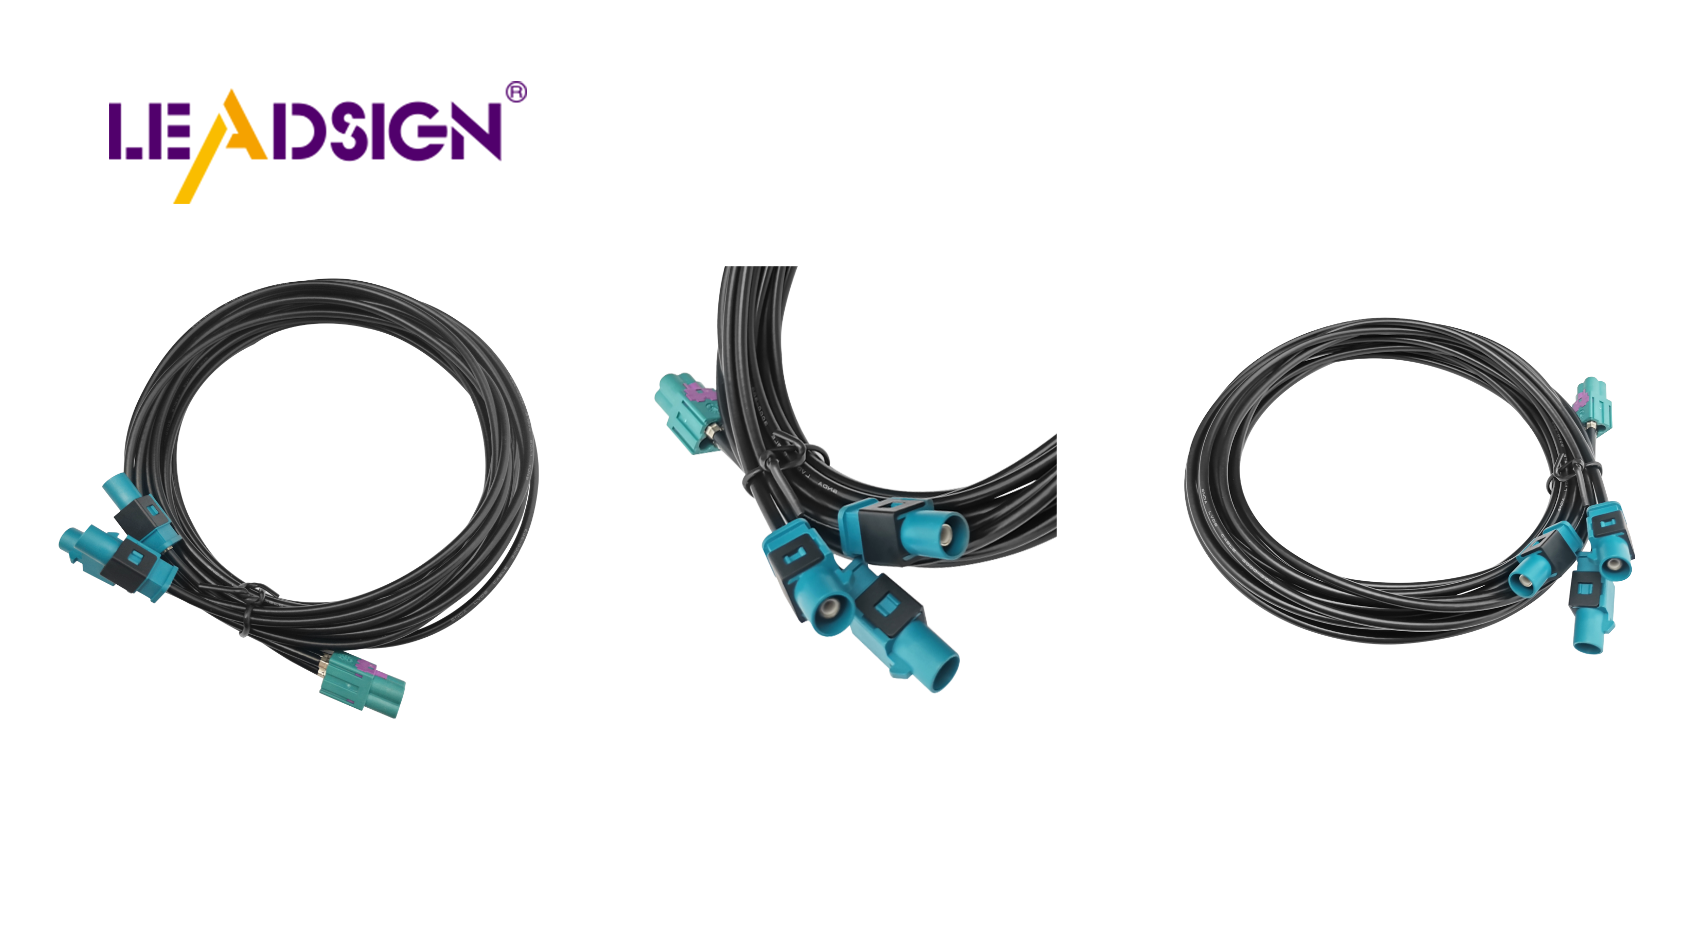
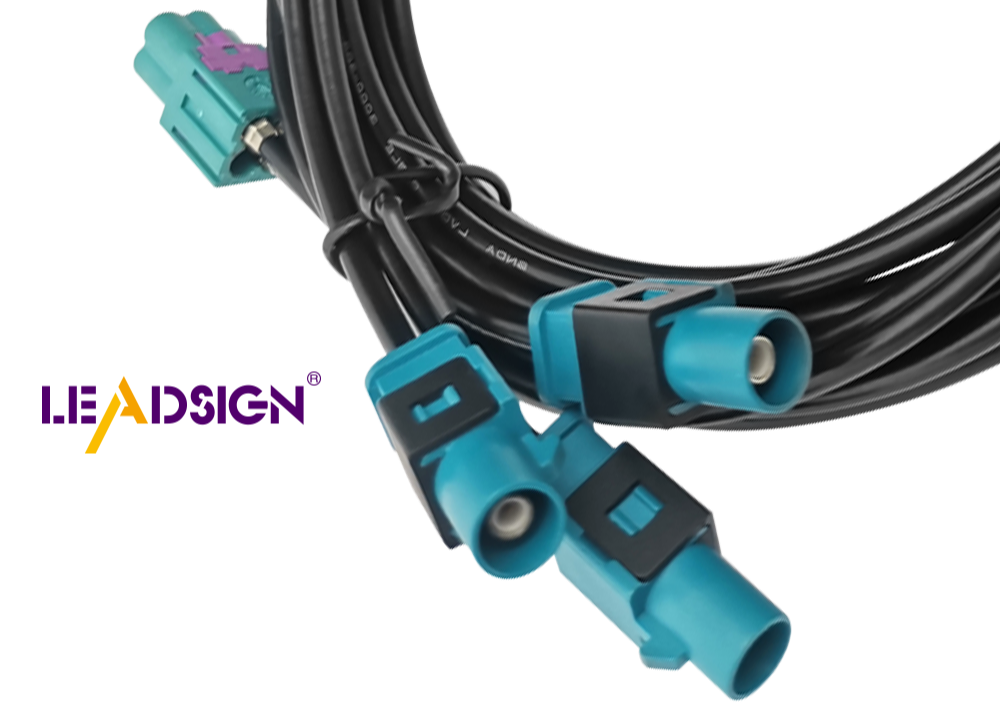
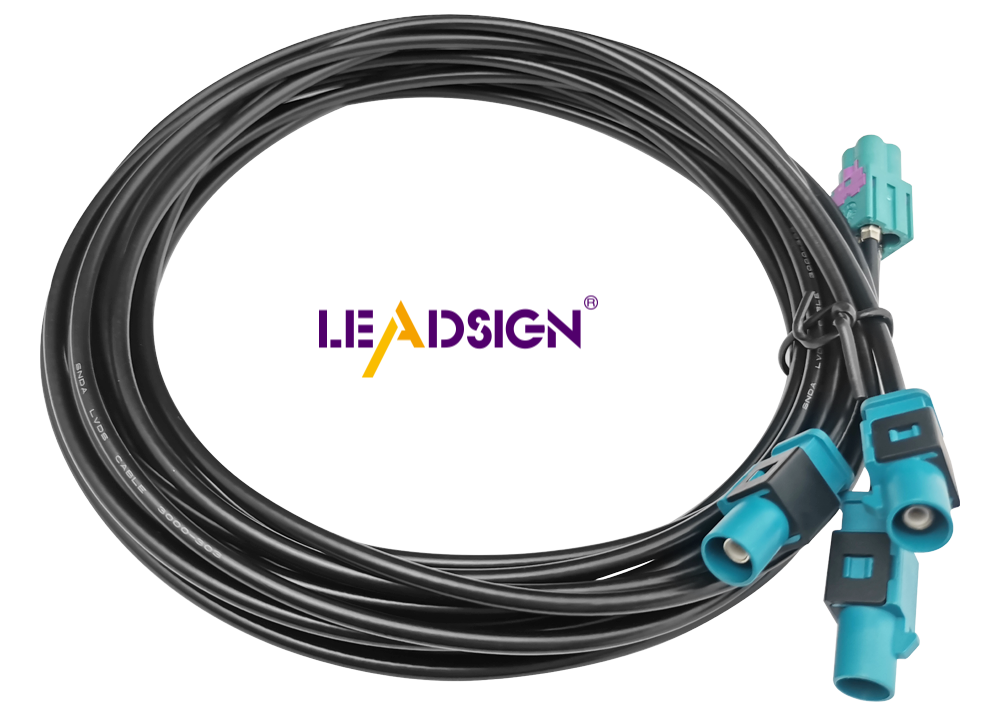
For high‑speed data (camera video, GPS, 5G, USB‑C), do not attempt field crimping – impedance mismatch will kill the signal. Instead, use pre‑terminated cables from LEADSIGN.
Why pre‑terminated?
Factory‑crimped and impedance‑tested.
Colour‑coded (FAKRA) – prevents mismating.
No special tools required – plug and play.
Custom lengths available (0.3m – 20m).
LEADSIGN provides:
✅ FAKRA (standard & Mini) – all 14 colours, 50Ω, up to 20 GHz, IP67 optional
✅ HSD (USB‑C, Ethernet, LVDS) – 100Ω, locking, up to 5 Gbps
✅ Pre‑terminated cables – any length, no field crimping
✅ Low‑loss, double‑shielded coax – for long runs and EV environments
✅ Bulk pricing for shops and fleets
For your business: When installing a backup camera or GPS, use LEADSIGN pre‑terminated FAKRA cables – saves labour, eliminates crimping errors, and guarantees signal quality.
6. Troubleshooting & Best Practices
🔹 Common Problems
Problem | Likely Cause | Fix |
|---|---|---|
Intermittent signal | Loose crimp or terminal | Re‑crimp; replace connector |
No power | Wire not fully inserted | Strip and re‑terminate |
Corrosion (green/white) | Unsealed connector in wet area | Replace with sealed (IP67) |
Camera flicker / no image | Using power connector for video | Use FAKRA (50Ω coax) |
USB‑C not recognised | Non‑HSD cable or poor crimp | Use LEADSIGN pre‑terminated HSD |
🔹 Best Practices Summary
Use OEM or high‑quality aftermarket connectors – avoid unbranded kits.
Perform pull test on every crimp – 5‑10 lbs.
Apply dielectric grease only to seals – never to electrical contacts.
Label wires – use heat‑shrink markers or tape flags.
Inspect annually – look for corrosion, loose locks, cracked housings.
Final Recommendations – Quick Installation Guide
Step | Action |
|---|---|
1 | Disconnect battery (negative first) |
2 | Strip wire correctly (5‑8 mm, no nicks) |
3 | Choose correct connector type (crimp for power; FAKRA/HSD for data) |
4 | Crimp with ratcheting tool; pull test |
5 | For exterior use, seal with adhesive heat‑shrink or use sealed housing |
6 | Test continuity and voltage drop |
7 | Secure harness with zip ties (strain relief within 5 cm of connector) |
8 | For FAKRA/HSD data, use LEADSIGN pre‑terminated cables |
Remember: A 5‑minute proper installation saves a 1‑hour callback.
Ready to simplify your data connector installations with pre‑terminated cables?
See Also
Essential Overview of HSD Connectors in Auto Sector
Navigating Fakra Connectors in Honda Cars
Exploring Ford's Fakra Connector Guide
