Mastering Car Wiring – A Professional Beginner’s Guide for Shops & Fleets (2026)

Intro: Car Wiring Is Not Just for Experts – It’s a Core Shop Skill
Understanding automotive wiring is essential for diagnosing electrical issues, installing accessories (cameras, GPS, USB ports), and performing reliable repairs. A technician who knows how to select the right wire, read schematics, and make secure connections will reduce comeback rates and improve customer trust.
This guide covers:
Essential tools and materials
Basic wire types, colour codes, and schematics
Step‑by‑step wiring process (identification, routing, joining, testing)
Safety setup and common mistakes to avoid
How modern data lines (FAKRA/HSD) differ from traditional power wiring
1. Tools & Materials – What Every Shop Needs
Basic Tools (for most wiring tasks)
Tool | Purpose |
|---|---|
Wire strippers (self‑adjusting or gauge‑specific) | Remove insulation without nicking copper strands. |
Ratcheting crimper (interchangeable dies) | Secure terminals onto wires; produces consistent, gas‑tight crimps. |
Multimeter (auto‑ranging, with continuity buzzer) | Measure voltage, resistance, check continuity. |
Heat gun | Shrink heat‑shrink tubing for insulation and strain relief. |
Screwdrivers, pliers, pick set | General disassembly, unlocking connectors. |
Cable ties, clips, loom tubing | Organise and protect wire bundles. |
Materials for Safe & Reliable Wiring
Material | Use |
|---|---|
Primary wire (stranded copper) | General circuits; choose cross‑linked (XLPE) for engine bay heat resistance. |
Connectors (sealed/unsealed) | Deutsch, Weather Pack for power; FAKRA/HSD for data. |
Heat‑shrink tubing (dual‑wall adhesive) | Seal and insulate splices; prevents moisture wicking. |
Crimp terminals (ring, spade, bullet, butt) | Match wire gauge and connector family. |
Fuse holders & fuses | Protect circuits from overload. |
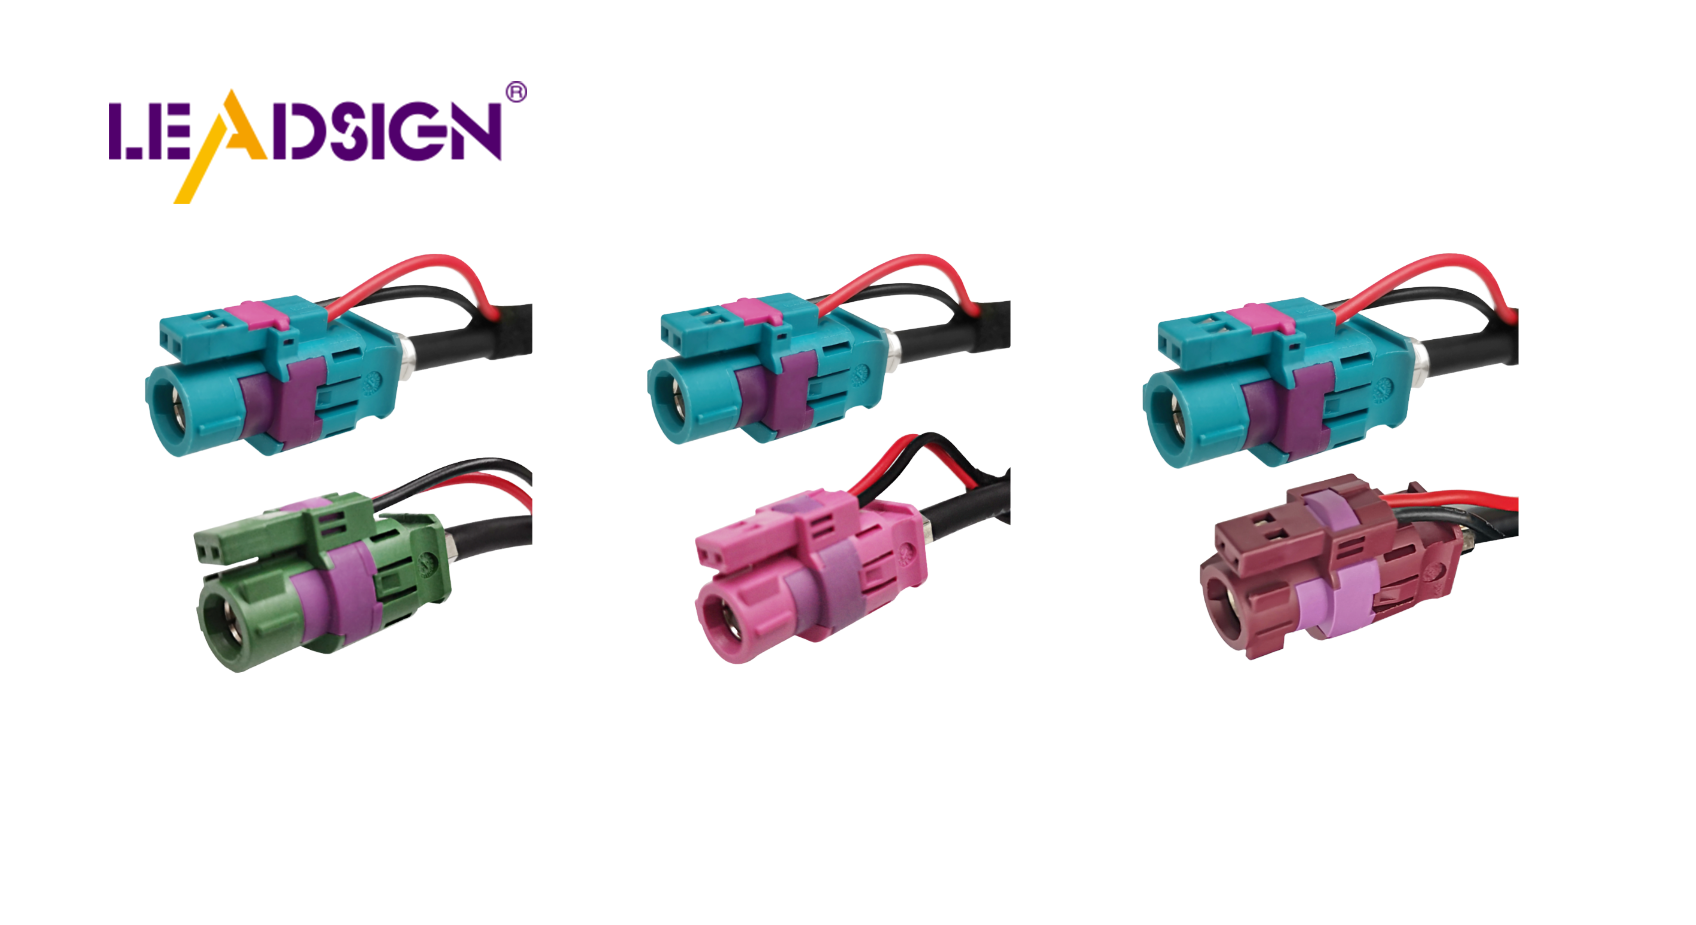
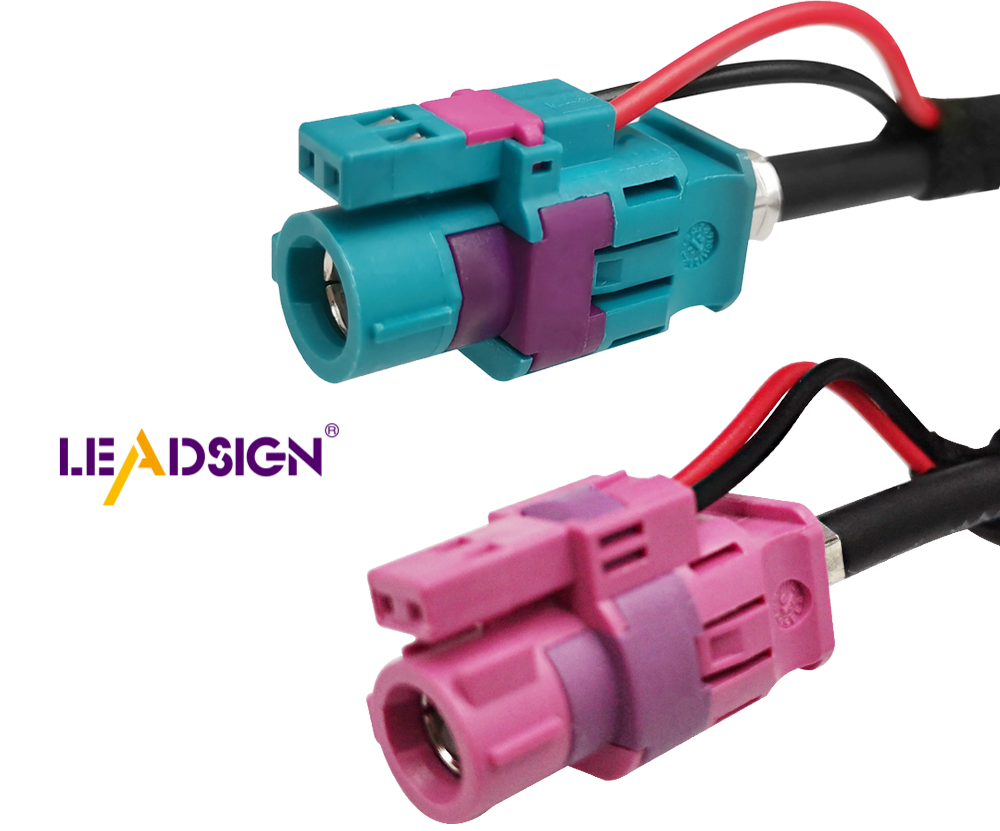
Pro tip: For cameras, GPS, and USB‑C installations, use pre‑terminated LEADSIGN FAKRA/HSD cables – no stripping, no crimping, no impedance errors.
2. Automotive Wiring Basics – What Every Technician Must Know
Wire Types
Type | Characteristics | Best Use |
|---|---|---|
PVC (primary wire) | Flexible, affordable, good for -40°C to +80°C | Interior, lighting, non‑engine compartments |
Cross‑linked (XLPE/GXL/TXL) | More heat resistant (-40°C to +125°C), tougher insulation | Engine bay, underbody, high‑temperature areas |
Coaxial (RG‑174, RG‑58, low‑loss) | Single centre conductor + shield, 50Ω | Camera video, GPS antenna, 4G/5G |
Twisted pair (shielded / unshielded) | Two insulated wires twisted together | CAN bus, sensors, microphone lines |
Wire Gauge (AWG) – Quick Reference
AWG | Typical current (chassis) | Common use |
|---|---|---|
22‑20 | Up to 5A | Sensors, switches, small signals |
18‑16 | 5‑15A | Lighting, fans, relays |
14‑12 | 15‑30A | Power distribution, headlights |
10‑8 | 30‑50A+ | Alternator, starter, winches |
Rule: Always use stranded copper wire – solid wire will break under vibration.
Wire Colour Codes (US standard – check vehicle manual)
Colour | Function |
|---|---|
Green or bare copper | Ground |
Black | Battery negative, sometimes switched ground |
Red / Orange | Battery positive (constant) |
Yellow | Ignition switched (accessory) |
Blue / Light blue | Lighting or remote turn‑on |
White / Grey | Signal or neutral (aftermarket) |
Note: OEM colours vary by manufacturer. Always verify with a wiring diagram.
Reading Wiring Schematics
Lines = wires (dashed lines sometimes indicate shielding).
Circles = connector pins or splice points.
Zigzags = resistors or loads.
Battery symbol = power source.
Ground symbol (three horizontal lines) = chassis ground.
Practice: Start with a simple circuit (e.g., a tail light). Trace from battery → fuse → switch → lamp → ground.
3. Step‑by‑Step Wiring Process (Professional)
Step 1: Identify & Label Wires
Use the vehicle’s wiring diagram.
Test with a multimeter (voltage, continuity, ground).
Apply heat‑shrink labels or coloured tape to each wire – note function (e.g., “+12V constant”, “reverse light trigger”).
Step 2: Plan the Routing
Keep wires away from hot exhaust, sharp edges, moving parts.
Use loom tubing or split conduit for abrasion protection.
Leave slack at connectors (service loop).
Step 3: Prepare & Join Wires
Strip 5‑8mm of insulation – do not nick strands.
Select correct terminal (open barrel, closed barrel, or pre‑terminated pigtail).
Crimp (preferred for vibration) or solder (only for low‑vibration interior).
For splices, use heat‑shrink butt connectors (adhesive‑lined) – no tape.
Step 4: Terminate & Seal
Insert crimped terminal into connector housing until click.
For sealed connectors, ensure silicone wire seal is in place.
If using ring/spade terminals, apply dielectric grease to the mating surface (optional) and torque (if bolt terminal).
Step 5: Test the Circuit
Reconnect battery (negative last).
Use multimeter:
Continuity: between source and load.
Voltage drop: <0.2V across a power circuit.
Resistance: <5Ω for ground paths.
Operate the device (light, camera, fan) – confirm function.
Step 6: Secure & Dress Harness
Use cable ties every 15‑25cm.
Attach to existing harness or sturdy points – never to brake lines or fuel lines.
Install fuse of correct rating as close to the power source as possible.
4. Safety – Setup & Practices
Safety practice | Why |
|---|---|
Disconnect battery negative terminal before any wiring work. | Prevents short circuits, sparks, airbag deployment. |
Work in a dry, well‑lit area with fire extinguisher (Class C) nearby. | Reduces shock risk; extinguisher for electrical fires. |
Use insulated tools (screwdrivers, pliers). | Protects against accidental contact with live circuits. |
Wear safety glasses and gloves when cutting or crimping. | Shields from wire fragments and sharp edges. |
Never work on wet surfaces or with wet hands. | Water conducts electricity – serious shock hazard. |
Pro tip: After reconnecting battery, turn on loads one by one and monitor for abnormal heat or noises.
5. Common Mistakes – And How to Avoid
Mistake | Consequence | Prevention |
|---|---|---|
Using solid (household) wire | Cracks under vibration → intermittent failure | Always use stranded automotive wire. |
Twist‑and‑tape splices | Corrosion, high resistance, fire | Use heat‑shrink crimp butt connectors. |
Over‑fusing | Wire melts before fuse blows | Match fuse to wire gauge (e.g., 15A fuse for 16 AWG). |
No strain relief | Wire pulls out of crimp | Zip‑tie within 5cm of connector. |
Skipping the wiring diagram | Misconnected circuits, blown fuses | Always have the diagram – even for “simple” jobs. |
Testing without multimeter | Misses intermittent or high‑resistance faults | Use multimeter for voltage drop and continuity. |
6. Wiring for Data – FAKRA, HSD, and Pre‑Terminated Cables
Modern vehicles contain high‑speed data lines for cameras, GPS, USB‑C, and Ethernet. These are not the same as power wires.
Feature | Power wiring (12V) | Data wiring (FAKRA/HSD) |
|---|---|---|
Wire type | Stranded copper | Coaxial or shielded twisted pair |
Impedance | Not specified | 50Ω (FAKRA) or 100Ω (HSD) |
Termination | Crimp eyelet or spade | Pre‑terminated connectors (field crimping very difficult) |
Test method | Voltage, continuity | VSWR, attenuation (requires specialised gear) |
Common failure | Corrosion, loose crimp | Impedance mismatch, broken centre pin |
Best practice for shops:
Do not attempt to splice or crimp FAKRA/HSD connectors in the field.
Stock pre‑terminated LEADSIGN cables in common lengths (1m, 3m, 5m, 10m) for cameras, GPS, USB‑C.
For custom lengths, order pre‑terminated from LEADSIGN – no tooling, no guesswork.
7. 2026 Trends – What Beginners Should Know
Trend | Implication |
|---|---|
More 4K cameras on trucks & vans | Use Mini FAKRA (20 GHz) – requires special pre‑terminated cables. |
5G telematics | Antenna cables are high‑loss; keep length short; use low‑loss coax. |
EV / hybrid | High‑voltage wiring (orange) requires special training – stay away unless certified. |
Pre‑terminated cable assemblies | Shops increasingly replace entire data cables instead of repairing connectors. |
Wireless diagnostics | Still need wired connections for programming – USB‑C (HSD) and Ethernet remain. |
What this means for a beginner: Focus on mastering basic power wiring first. When you encounter coloured plastic connectors (blue, amber, violet), do not cut them – replace the entire cable with a pre‑terminated one.
8. Why LEADSIGN – Your Partner for Modern Data Wiring
While traditional power wiring uses generic terminals, data wiring requires precision. LEADSIGN provides pre‑terminated FAKRA, Mini FAKRA, and HSD cables that eliminate field‑termination errors.
What LEADSIGN offers for shops and fleets:
✅ FAKRA (all 14 colours) – standard and Mini, 50Ω, up to 20 GHz, IP67 optional
✅ HSD (USB‑C, Ethernet, LVDS) – 100Ω, locking, up to 5 Gbps
✅ Pre‑terminated cables – any length from 0.3m to 20m
✅ Low‑loss, double‑shielded coax – for long runs and EV environments
✅ Bulk pricing – keep common lengths in stock
For your business: When a camera or GPS fails, replace the entire LEADSIGN cable – not just the connector. Faster, more reliable, and no special tools required.
Final Recommendations – Beginner’s Wiring Checklist
Step | Action |
|---|---|
☐ | Get the vehicle’s wiring diagram. |
☐ | Disconnect battery. |
☐ | Identify and label wires with multimeter. |
☐ | Choose correct wire gauge and type (stranded, cross‑link if engine bay). |
☐ | Use heat‑shrink crimp connectors – no tape. |
☐ | Route away from heat/sharp edges; use loom. |
☐ | Crimp terminals with ratcheting tool; pull test. |
☐ | Test continuity and voltage drop before final assembly. |
☐ | Secure harness with cable ties. |
☐ | Reconnect battery and test operation. |
Pro tip for beginners: Practice on a spare harness or old vehicle before working on a customer’s car. Master crimping and multimeter basics – they will serve you for your entire career.
Ready to upgrade your wiring skills and inventory?
[Request a free LEADSIGN FAKRA/HSD sample kit] | [Get bulk pricing for pre‑terminated cables] | [Download 2026 automotive wiring reference guide]
Summary of Changes
Original Problem | Revision Strategy |
|---|---|
Basic, consumer‑level beginner guide | Rewritten for professional B2B (apprentice technicians, shop trainers). |
No technical depth on wire types, gauges, colour codes | Added tables and professional references. |
Missing safety & mistake prevention | Added safety checklist and common mistake table. |
No distinction between power and data wiring | Added section on FAKRA/HSD and why pre‑terminated cables are essential. |
No 2026 trends | Added 4K, 5G, EV, pre‑terminated cables. |
No commercial CTA | Added LEADSIGN sample kit, quote, guide download. |
If you would like a shorter version for a training handout or a printable “Basic Wiring Quick Reference” poster, please let me know. You can also send me other low‑click articles for the same treatment.
See Also
Understanding HSD Connectors Essential for Automotive Applications
A Detailed Wiring Guide for Fakra HSD LVDS Connectors
An In-Depth Overview of HSD Connectors
Navigating Ford Fakra Connectors: An Essential Guide
Enhancing Data Transmission in Vehicles with Advanced Connectors
